
Xprinter XP-q200 Printer Driver
for Windows / Linux / Mac
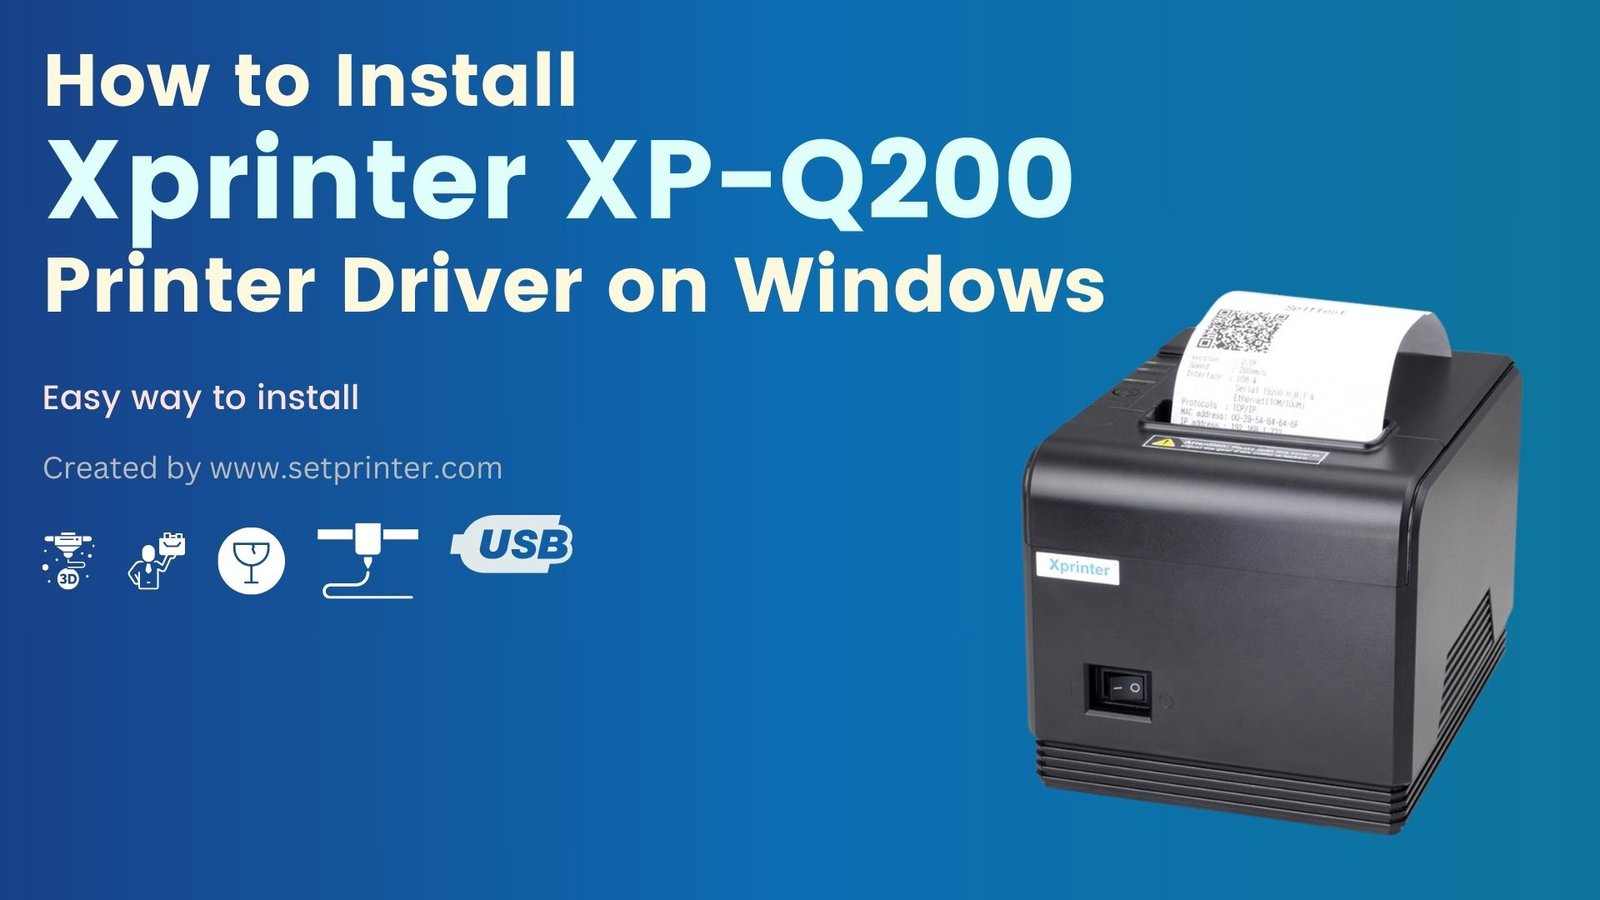
Xprinter XP-q200 is a receipt printer which is usually used in stores and shopping malls. To attach this printer to your computer, you need to download and install its driver on your computer. Then your computer will be able to use this printer. To download the driver, please go to the driver download section below where I have mentioned the driver download link and prepare the installation guide so that anyone can install the q200 printer using the given guide and the drivers.
Go to the below given download section and download the Q 200 metro driver for your Windows.
Download Xprinter XP-Q200 Printer Driver
- First, check the version of your Windows.
- Go to the downloads section below and click on the download link according to your version of Windows.
Driver for Xprinter XP-Q200 Printer
Type: Full Feature Driver Operating System: Windows File Size: 6.92 MB Version: 2.1 Download DriverDriver for Xprinter XP-Q200 Printer
Type: Basic Driver Operating System: Windows File Size: 22 MB Version: 2.0 Download DriverHow to Install Xprinter XP-Q200 Printer Driver
Time needed: 15 minutes
To install the Q200 printer on your computer, you just need to follow the following instructions.
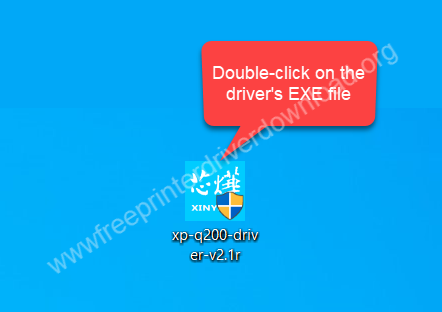
- Double-click on the downloaded driver’s EXE file.

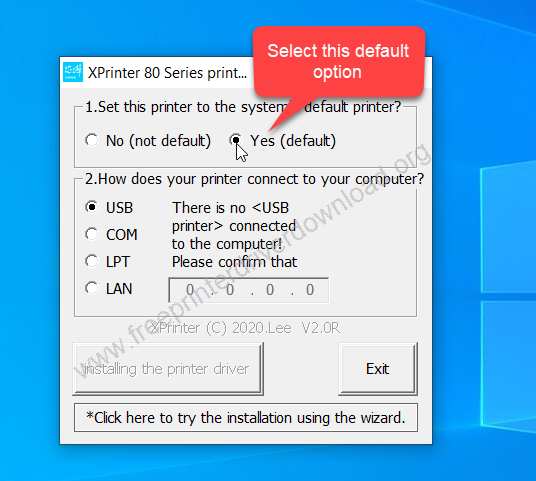
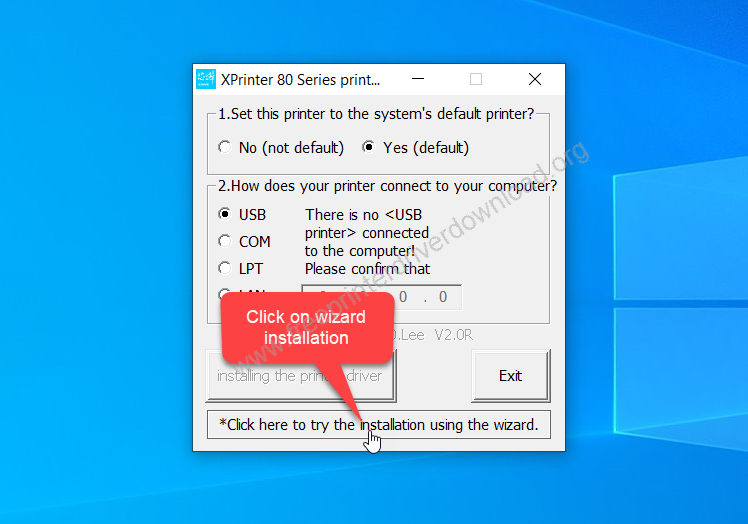
- Select the “Yes (Default)” option to set the printer as the default printer.

- Click on the manual wizard installation option

- Select “Add a Local Printer” and click on Next


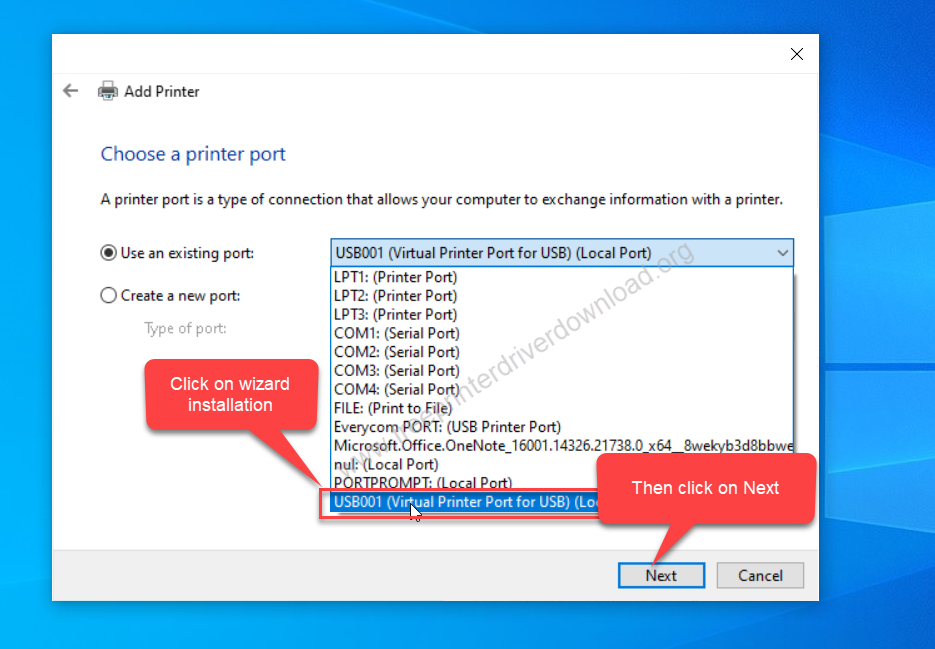
- Select the port where your printer is connected right now. Then click on Next. I recommend you to choose USB001, USB 002 or USB 003 port.

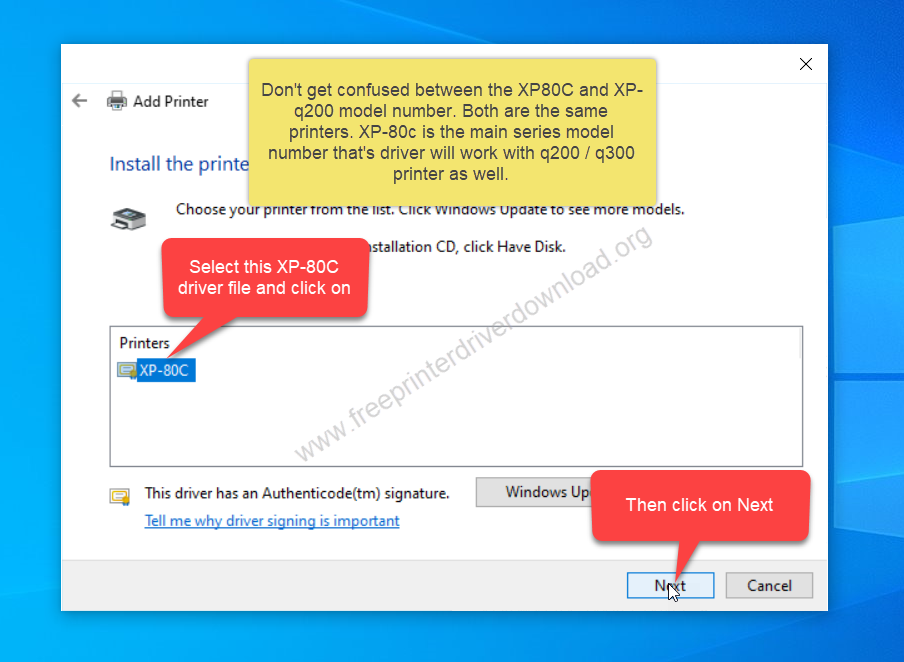
- Select XP-80c driver and click on Next. Do not confuse the model number. Both are the same drivers XP-80C is the main series model number that driver will work with Q200 and Q300 printers as well.

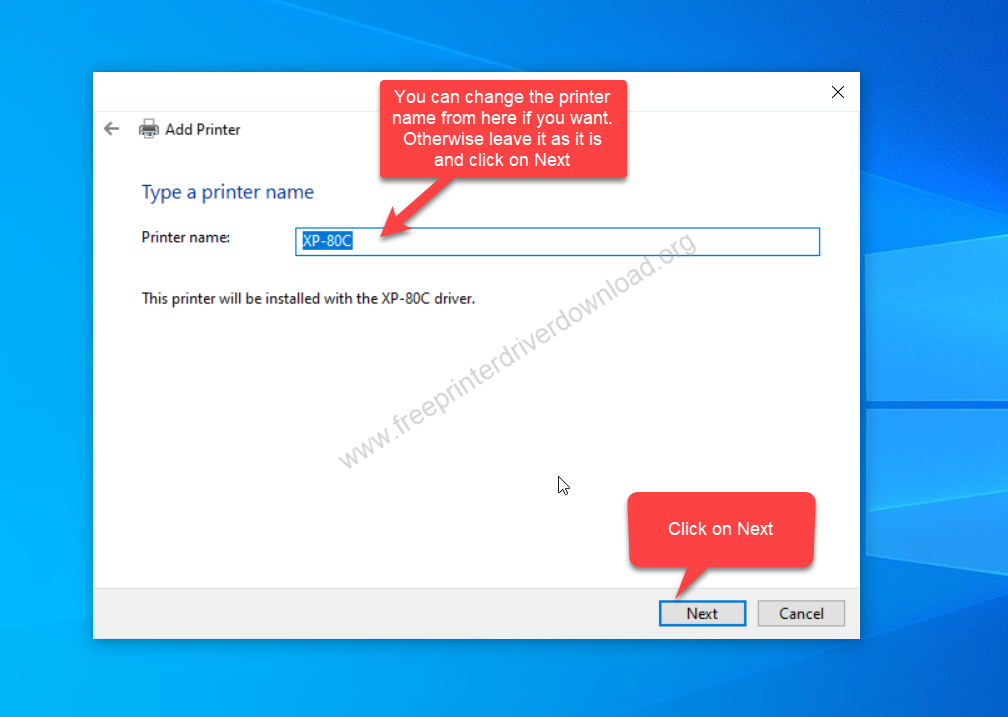
- Here, you can change the name of the printer if you want. Change the printer name (XP-q200) and click on Next, or you can leave it as it is if you don’t want to change the name.

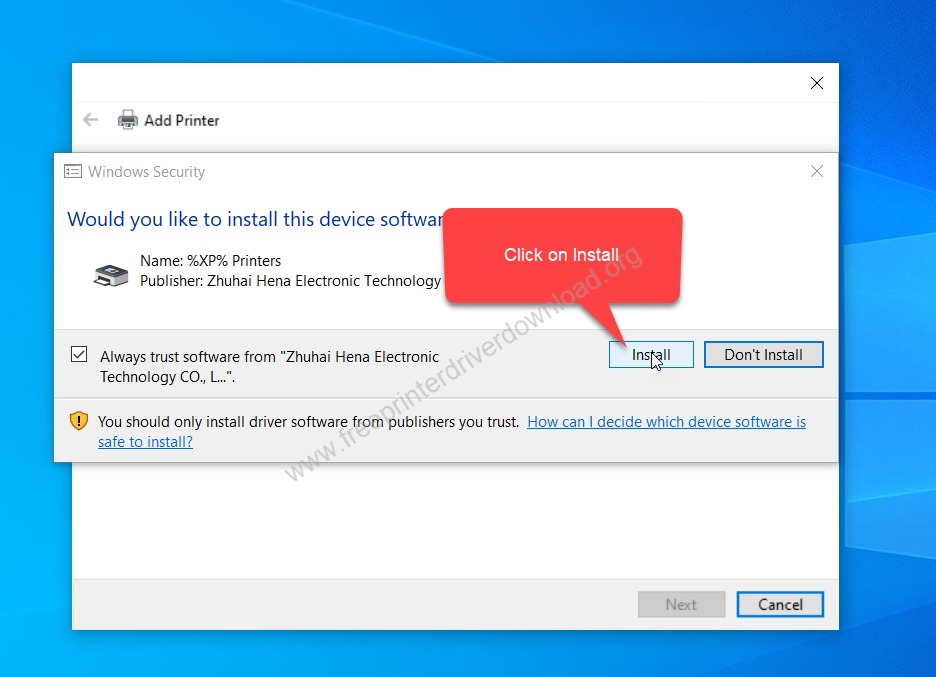
- It is asking to install the driver so click on install.

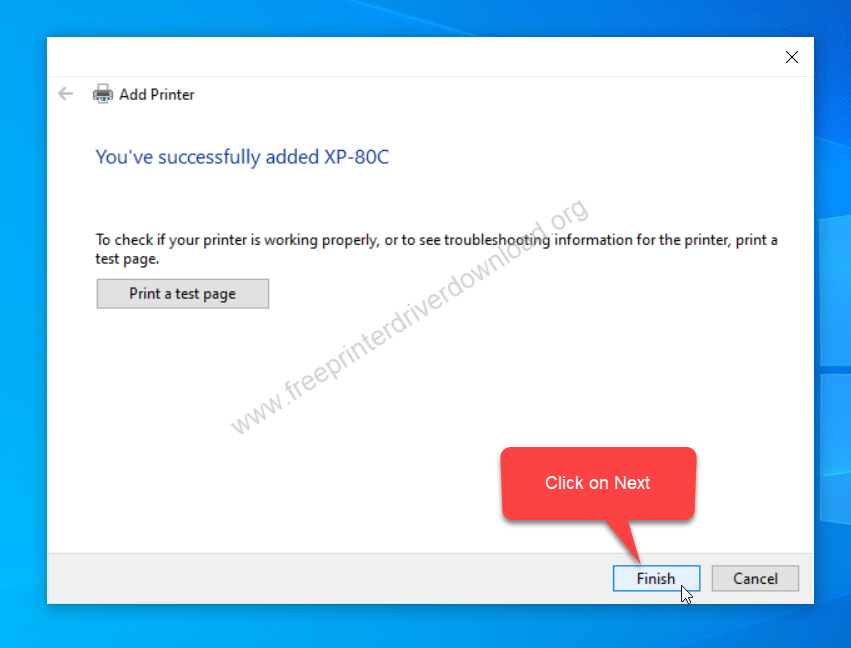
- Xprinter XP-80c printer driver has been installed successfully. Click on Finsih.

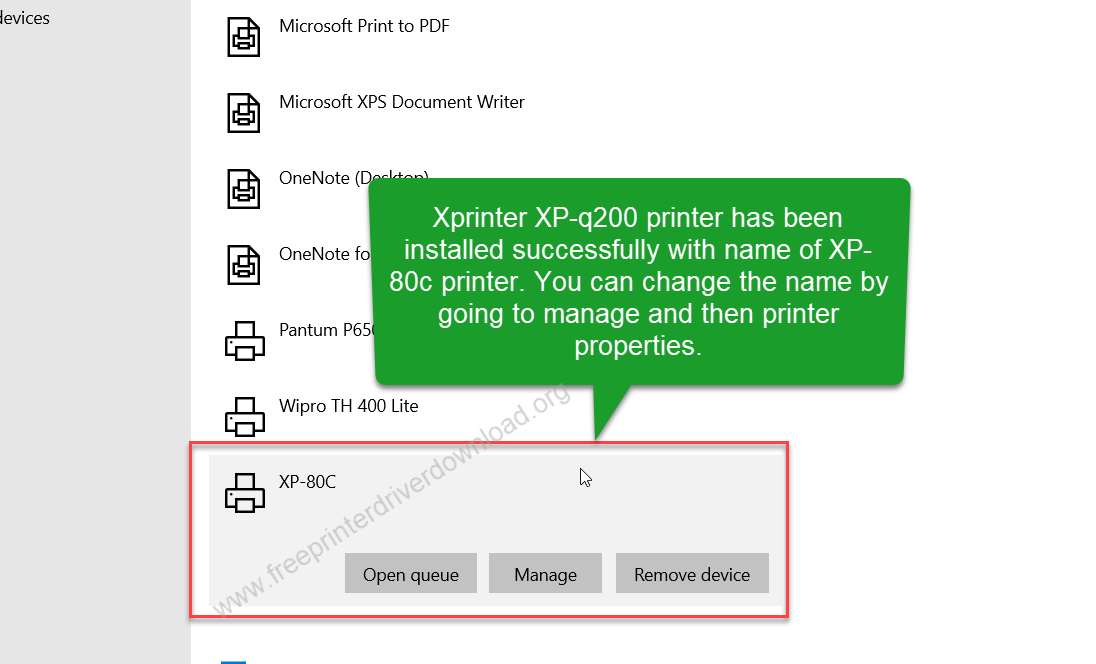
- Go to the printer’s page and check if the printer has been installed with the name of x80c. If you want, you can change the printer’s name by clicking on “manage” and then click on “printer properties.” if you don’t want to leave it as it is.

