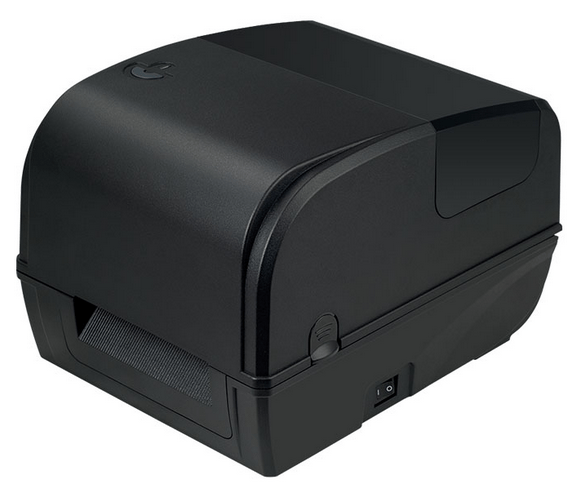
Xprinter XP-410b is a label printer which is mostly used in shopping malls and stores where you need to print labels to stick onto products. To print from this 410b printer through the computer, you will require its driver and install it on your computer, then your computer can communicate with the printer and give commands to the printer.
To download its driver, go to the download section below and choose your operating system version and system type and then download its driver from below. After downloading the driver, see the How-to install guide to know the correct method
Download Xprinter XP-410b Driver
Choose the download link in-front of your operating system and click on that.
Driver for Xprinter XP-410b Printer
Type: Full Feature Driver Operating System: Windows File Size: 43 MB Version: 1.5 Download DriverHow to Install Xprinter XP-410b Printer Driver on Windows
Step 1: Unzip the driver file – right-click on the driver’s zip file and then click on “extract to” “unzip”.
Step 2: Make sure your printer should be connected to your computer through the USB cable and the printer should be turned ON.
Step 3: Click on the Start button and then click settings and then Devices.
Step 4: A settings page will open up. Click on “Printers & Scanners” and then click on the “Add a printer or scanner” plus icon.
Step 5: Then click on “The printer that I want is not listed”.
Step 6: A printer installation wizard page will open up. Choose the last option “Add a local printer or network printer with manual settings” and then click on Next.
Step 7: Now, it is asking to choose the printer port. Choose the port “USB001/002/003” – where your printer is connected right now.

Step 8: After that, it is asking to choose the driver. Click on “have disk” and then “browse” button and then go to the location where you have extracted or unzipped the driver file.

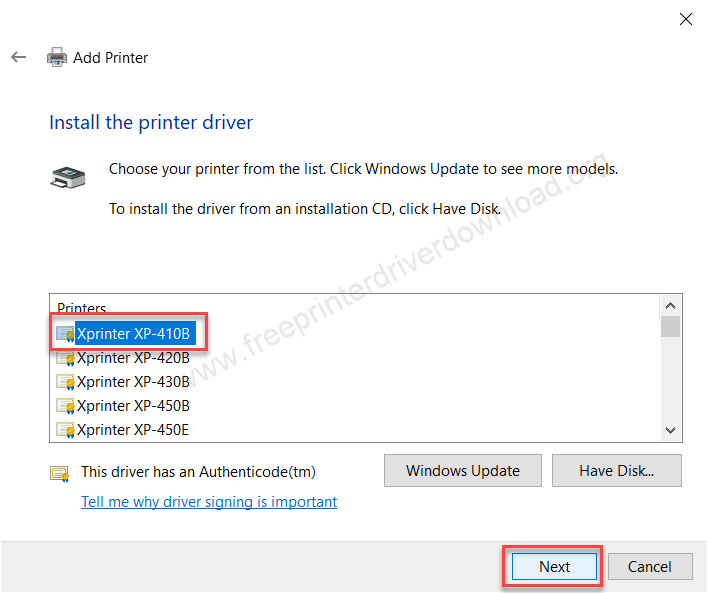
Step 9: Next, choose the “Xprinter.inf” file name and then click on OPEN and the OK.

Step 10: Now, choose the printer model number from the list and then click on Next.
Step 11: It is installing the drivers so please wait. After that, click on Next and then Finish.