Xerox c235 printer is a multifunctional printer with color laser technology. You can print from your phone wirelessly. It also has network connectivity so that you can connect this printer to your local network for seamless printing. As you know it has versatile connectivity options and various useful features, you can use all these features through your computer by installing its latest version driver on your computer. To download the driver, go to the download section and download the driver according to the version of your operating system. Additionally, I have prepared a step-by-step installation guide and shared it with you guys in the “how-to“ install which is just beneath the download section. So, let’s start by downloading the drivers first.
Download Xerox C235 Printer Driver
To download the driver, determine your operating system and your system type (32bit or 64bit) and then click on the below given download link according to the version of your operating system.
Driver for Xerox c235 Printer
Type: Full feature driver Operating System: Windows File Size: 3 MB Version: 2.1.22 Download DriverOR
You may download the same driver directly from the Xerox c235 official download page.
How to Install Xerox C235 Printer Driver in Windows
After downloading the driver, you must read the below given step-by-step installation guide to better understand how to install Xerox c235 printer in Windows.
Here are the steps:
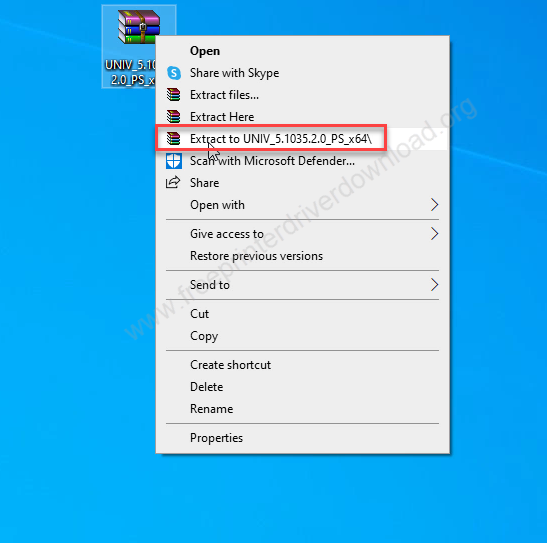
Step 1: Download the PS drivers from the above given download links and then right-click on it and click on extract all. Basically you have to unzip the driver file.
Step 2: Let’s start installing the printer manually – click on the start menu button and then click on the settings icon and then and click on devices.
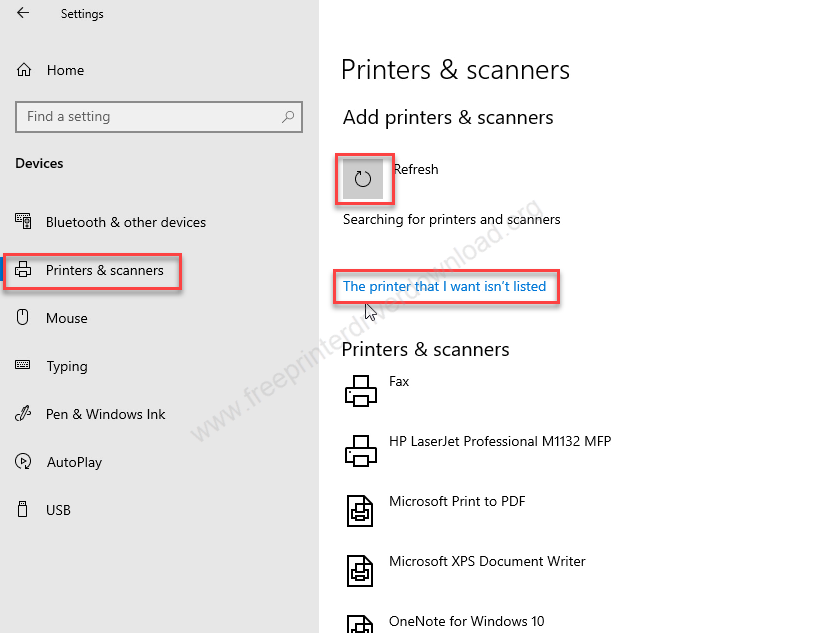
Step 3: Click on “Printer & scanner” from the left side pane and then click on plus icon of “Add a printer or scanner” and then click on the link “The printer that I want is not listed”. It will open up manual installation wizard.
Step 4: In this wizard, choose the last option: “Add a local printer….” and then click on next.

Step 5: After that it will ask for choose the printer port – where your printer is connected right now. I suggest you to please choose one of USB001 / USB002 / USB003 – which is available. Then click on next..

Step 6: Now it will ask for the driver, so click on the “Have Disk” button and “Browse”.

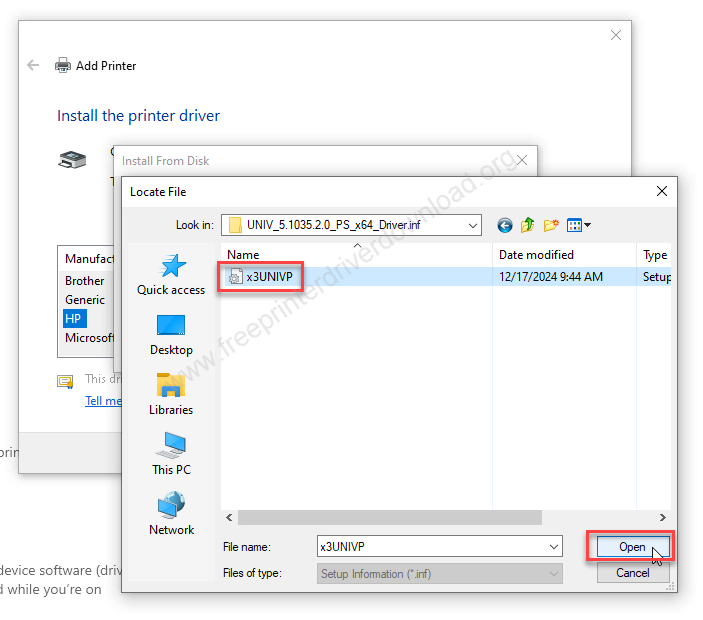
Step 7: Go to the location where you have unzipped the driver files and choose “x3UNIVP.inf”driver file and then click open then click on OK.
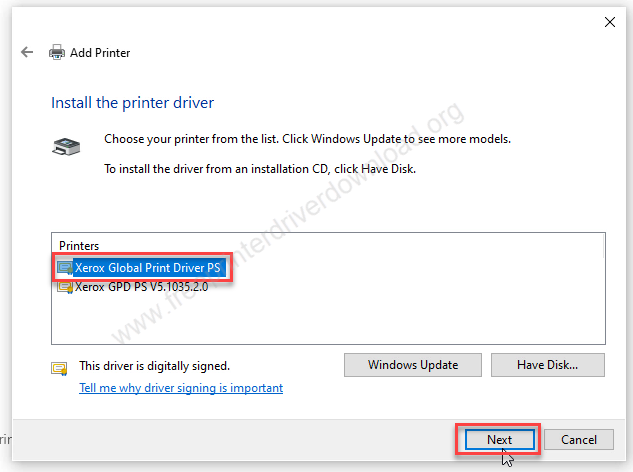
Step 8: Then select the driver optoin: “Xerox Global Print Driver PS”
Step 9: Now rename the printer to Xerox c235 and then click on Next.

Step 10: Please wait while it is installing the drivers.

Step 11: Choose the first option: “Don’t share this printer” and then click on Next.

Step 12: Click on “Print a test page” if you want to print a test page and then click on Finish button.

Step 11: As you can see on the screen, the Xerox c235 printer has been installed succesffully.

That’s it.
Hopefully, you have learned how to install Xerox c235 printer driver on Windows, Linux and Mac OS. If you have any doubts please leave it in the download section below.