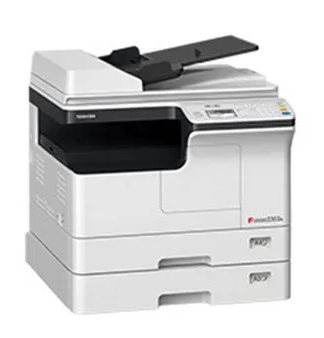
The Toshiba e-Studio 2303A driver download links you will get on this page are for Windows, Mac and Linux operating systems. Apart from the genuine Toshiba printer and scanner drivers, we have also shared their comprehensive installation guides so that you can install your drivers without any issues.
Download Toshiba e-Studio 2303A / AM Driver
All the operating systems supported by this Toshiba all-in-one printer have been mentioned in our OS list given below. Go through our OS list and select the operating system where you want to install this Toshiba printer, then use its download button to start the download of your Toshiba e-Studio 2303A driver setup file.
Toshiba e-Studio 2303A Driver for Windows
Driver for Mac
Driver for Linux/Ubuntu
OR
You may download the same driver directly from the Toshiba website.
How to Install Toshiba e-Studio 2303A / AM Driver
In order to properly install the Toshiba printer and scanner drivers you must install them by using their proper installation method. Therefore, we are sharing below installation guides for the Toshiba driver package and the Toshiba INF driver. Select the installation guide which is related to your driver type, then read its instructions carefully and follow them accordingly to avoid driver installation mistakes.
1) Install Toshiba e-Studio 2303A Printer Using Full Feature Driver
If you want to install this Toshiba printer using its Toshiba e-studio 2303A/AM setup CD printer drivers, then I will describe the complete installation process in the steps given below. You can follow the installation steps given below for all the versions of the Windows operating system.
- Right click on the setup CD ISO file downloaded from this guide and choose the ‘Mount‘ option from the menu.
- In the setup CD contents, double click to open the ‘Drivers’ folder.
- Inside the Drivers folder, locate and run the ‘setup.exe’ file.
- In the Welcome screen, choose the ‘I accept the terms of the license agreement’ option to agree with the License Agreement, then click on the ‘Next’ button.
- In the Printer Connection Type screen, if you want to connect your printer now, then select your preferred method of connecting your printer with your computer and follow the steps accordingly. I have decided to connect my printer afterwards, therefore, I have chosen the ‘Select if you want to install the software without connecting the printer’ option. Finally, click on the ‘Next’ button.
- In the Select Software screen, select the software you want to install on your computer. If you don’t know which software to select, then proceed with the default selections. Finally, click on the ‘Next’ button.
- Wait for the setup program to install the scanner driver on your computer.
- Click on the ‘Install’ button to begin the installation of the driver on your computer.
- Wait for the setup program to install the printer driver on your computer.
- When you see the message that all your selected software has been installed, then click on the ‘Finish’ button to close the setup program.
That’s it, you have successfully installed the Toshiba e-studio 2303A/AM printer drivers on your computer. Your Toshiba printer is now ready to print, scan and copy pages.
2) Install Toshiba e-Studio 2303A Printer Using INF Driver
If you want to install this Toshiba printer by using its Toshiba e-Studio 2303A INF driver, then read the installation guide shared below. Our guide clearly describes the proper installation method for the Toshiba e-Studio 2303A basic driver on a Windows computer. Check it: How to install driver manually using basic driver (.INF driver)
Toshiba e-Studio 2303A Printer Specification
The Toshiba e-Studio 2303A all-in-one has been designed to be used as a copier machine. This Toshiba printer is a mono laser printer capable of delivering copying/printing speeds of up to 23 ppm. This laser printer can print A3 sized documents and supports USB connectivity option.
Toner Cartridge Details: This Toshiba laser printer uses one Black (6AG00007240) toner cartridge, which can print up to 17000 pages.
