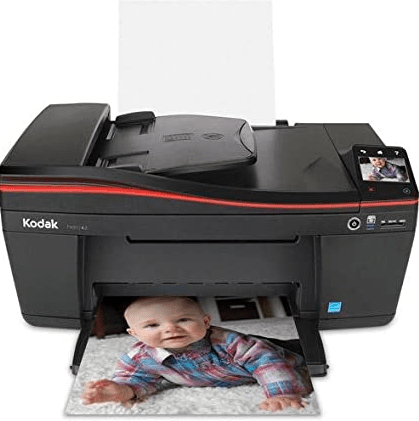
 If you have lost or damaged the driver disc of your Kodak Hero 4.2 all-in-one printer and now you are searching for its driver on the Internet, then you have arrived at the right place.
Although, here you’ll get a direct download link which will redirect you to Kodak’s official where you may download the driver. Alternatively, you may download the same drivers from the download section given below.
In the download section, you’ll get Kodak Hero 4.2 driver download links for Windows 11, 10, 8, 8.1, 7, Vista, XP (32bit / 64bit), Server 2000 to 2022, Linux, Ubuntu, and Mac 10.x, 11.x, 12.x, 13.x Ventura operating systems.
Once you have downloaded the drivers according to your operating system, you must read the instructions in the installation section to properly install the newly downloaded printer drivers on your computer. Let’s start by downloading the driver first.
Steps to Download Kodak Hero 4.2 Driver
All the operating systems supported by this Kodak printer have been mentioned in our OS list given below. Follow these download steps to get the appropriate printer driver for your chosen OS version:
Step 1: Choose the operating system from our OS list where you want to install this Kodak printer.
Step 2: Click on the printer driver link to start the download of your Kodak Hero 4.2 printer driver setup file and the scanner driver link to get your Kodak Hero 4.2 scanner driver setup file.
Kodak Hero 4.2 Driver for Windows
Driver for Mac
Driver for Linux/Ubuntu
OR
Download the driver directly from the Kodak Hero 4.2 official website.
How to Install Kodak Hero 4.2 Driver
Proper installation of the Kodak printer drivers is important if you want to avail the best performance of this inkjet printer. In this section, I have shared the detailed installation guide for the full feature driver and basic driver (inf driver).
Choose the guide which describes the installation process of your printer drivers, then follow its instructions for installing the Kodak Hero 4.2 printer drivers on your computer.
1) Install Kodak Hero 4.2 Printer Using Full Feature Driver
You can install this Konica Minolta printer by using its full feature Kodak Hero 4.2 driver as well. Therefore, read the installation guide given below, which clearly describes the installation process for the Kodak Hero 4.2 driver package on a Windows computer. Check out this article: How to install a printer driver automatically using its setup file.
2) Install Kodak Hero 4.2 Printer Using Basic Driver
In this installation guide, I will describe the installation process for the Kodak Hero 4.2 basic driver on a Windows computer.
I have attached an image file with each installation step so that you can fully understand the installation process and execute it without any confusion. You can use the installation steps given below for all the versions of the Windows operating system.
Steps:
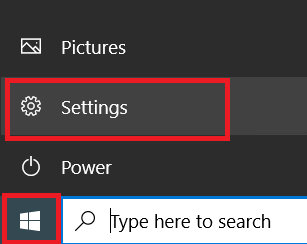
- Click on the ‘Start’ button and select ‘Settings’ option from the menu.
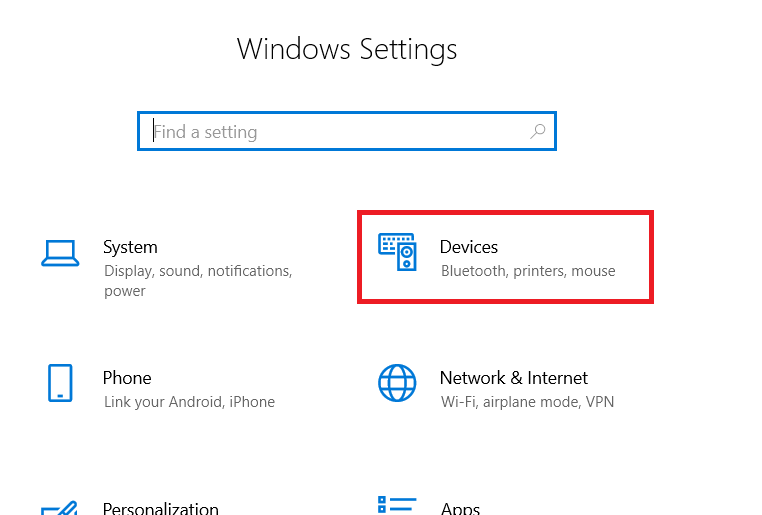
- In the Settings page, click on the ‘Devices’ option.
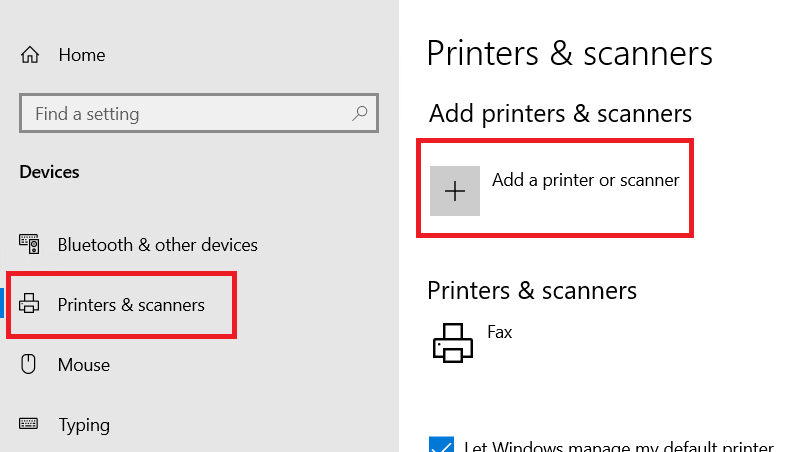
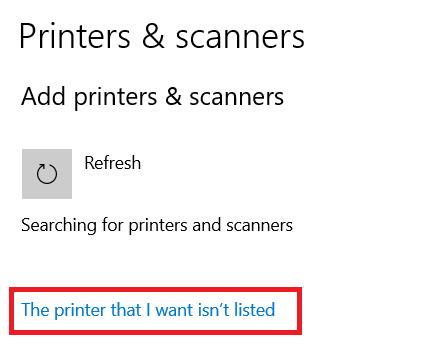
- In the Devices page, choose the ‘Printers & scanners’ option in the left pane, then click on the ‘Add a printer or scanner’ link.
- Click on the ‘The printer that I want isn’t listed’ link as and when it appears on the screen.
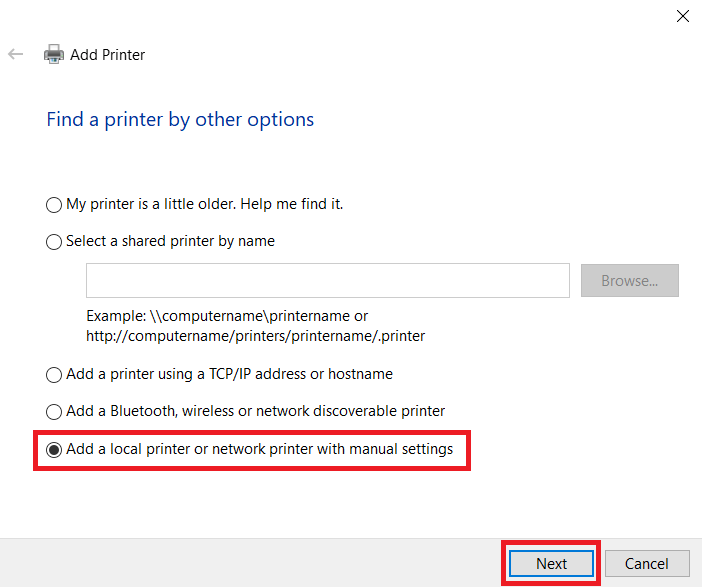
- In the Add Printer screen, choose the ‘Add a local printer or network printer with manual settings’ option, then click on the ‘Next’ button.
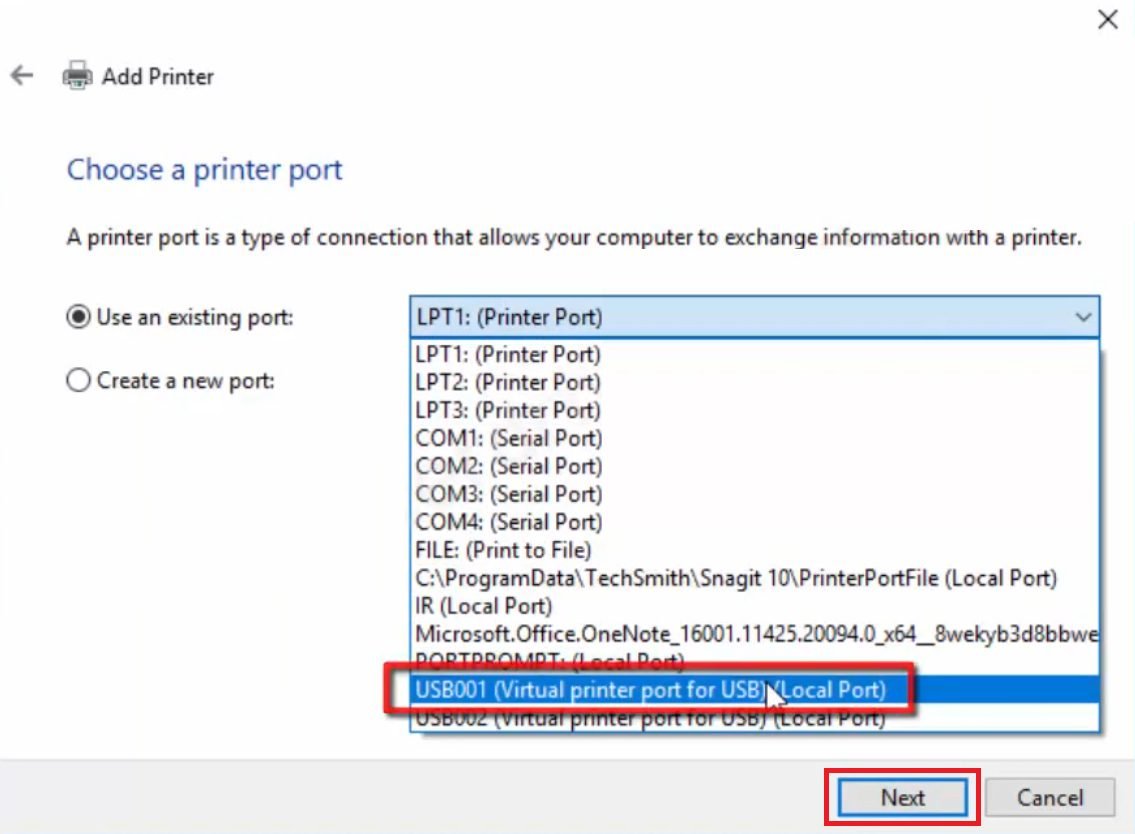
- In the Choose a printer port screen, choose the ‘USB’ port from the list of available ports, then click on the ‘Next’ button.
- Click on the ‘Have Disk’ button.
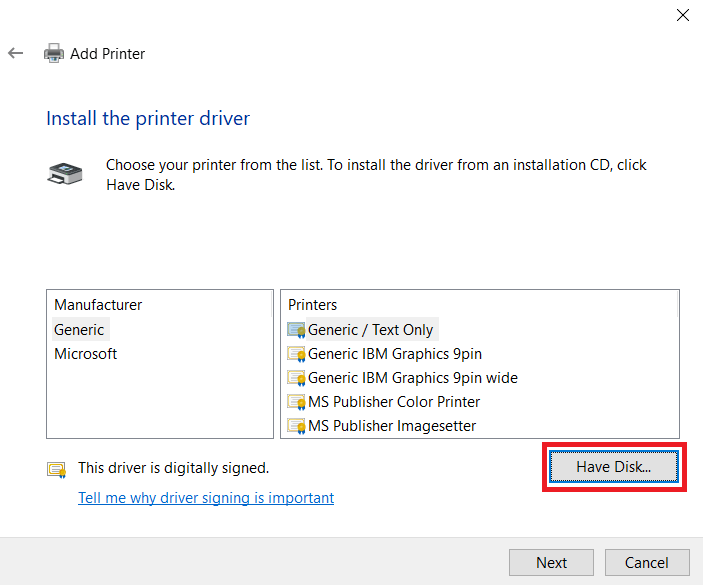
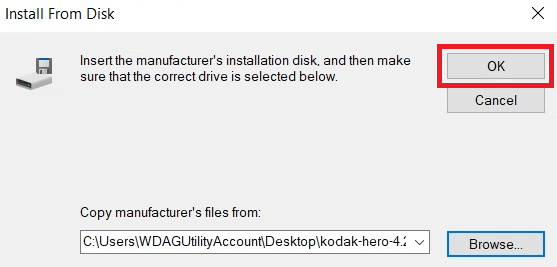
- In the Install From Disk dialog box, click on the ‘Browse’ button.

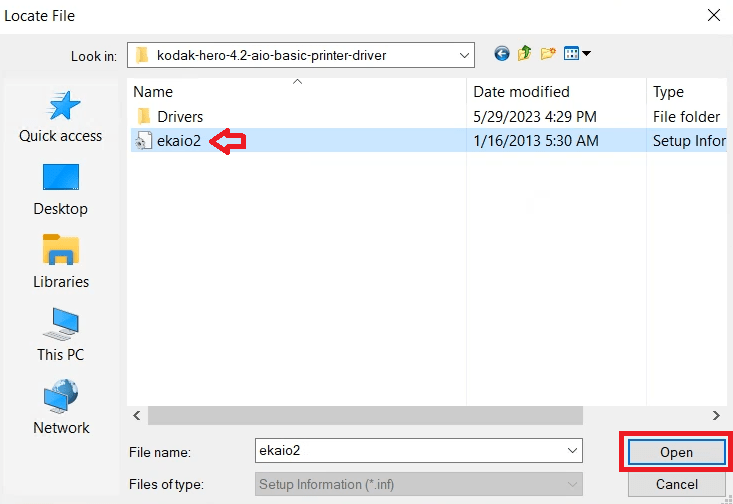
- In the Browse window, go to the printer driver folder where you have extracted the Kodak driver files, then select the ‘ekaio2’ inf file and click on the ‘Open’ button.
- In the Install From Disk dialog box, click on the ‘OK’ button.
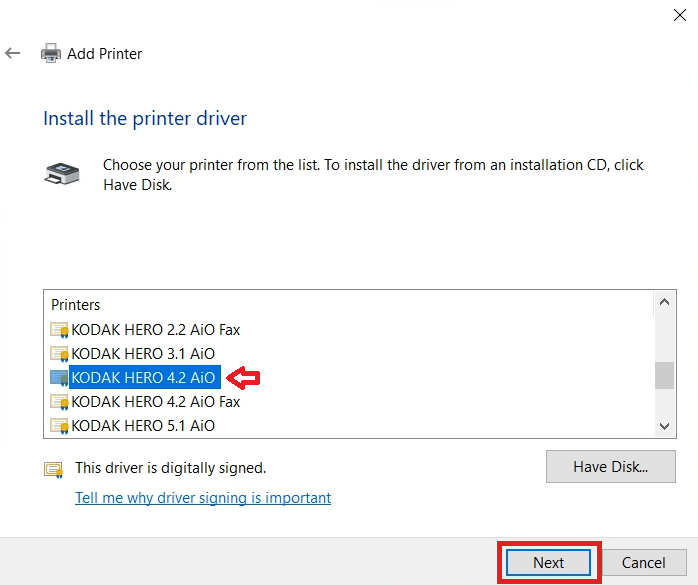
- Scroll the list of printer models to locate and select the ‘KODAK HERO 4.2 AiO’ printer, then click on the ‘Next’ button.
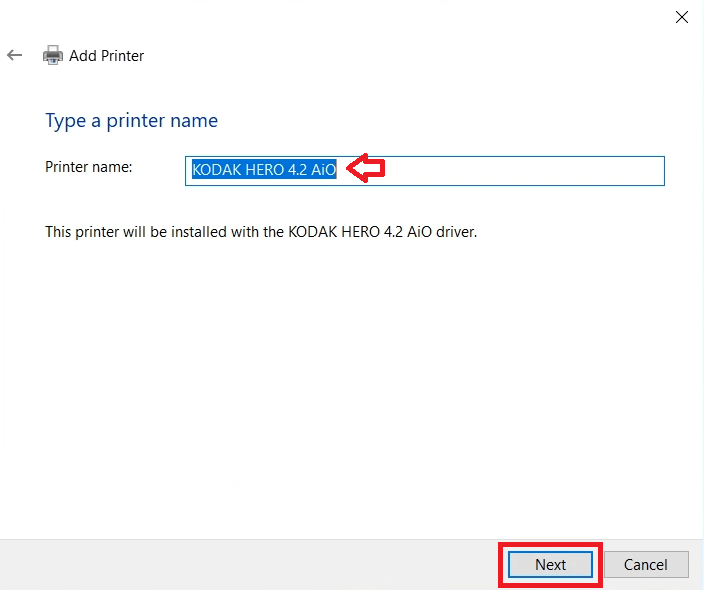
- If you want, then you can change the name of your printer, otherwise, continue with the default name. Finally, click on the ‘Next’ button.
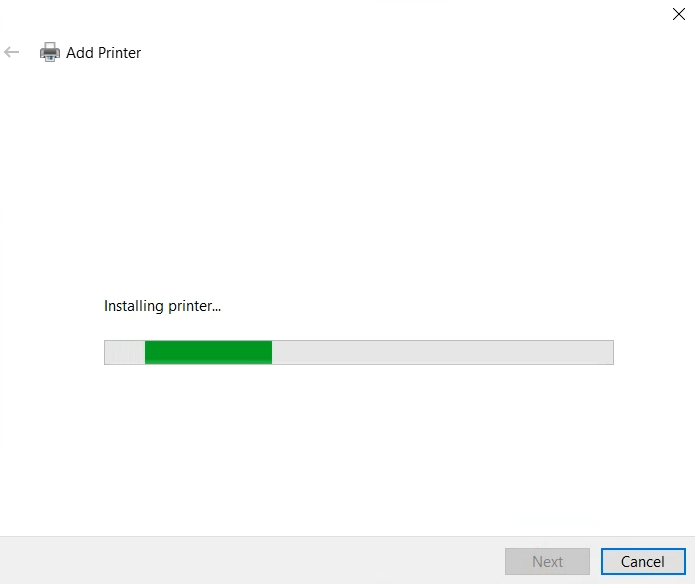
- Wait for the printer drivers to install on your computer.
- In the Printer Sharing screen, select the ‘Do not share this printer’ option, then click on the ‘Next’ button.

- When you see the message that your Kodak printer is successfully added to your computer, then click on the ‘Finish’ button to close the installer program.
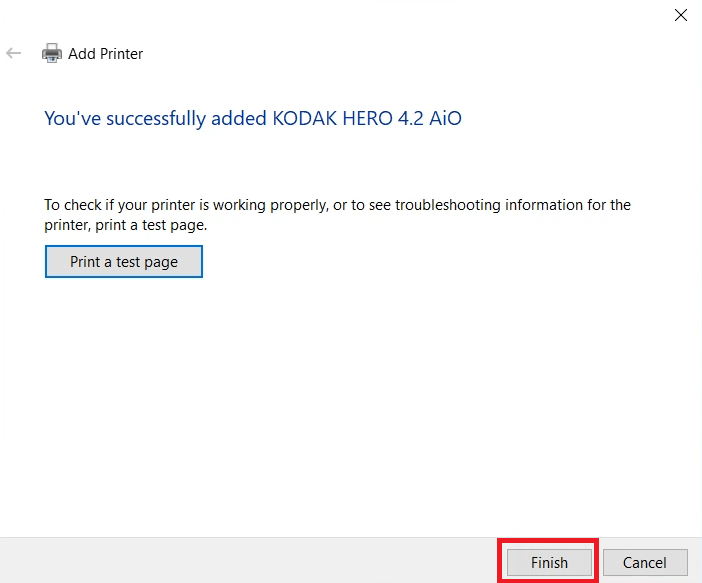
That’s it, you have successfully installed the Kodak Hero 4.2 INF driver on your computer. Your Kodak all-in-one printer is now ready to print, scan and copy documents.
Kodak Hero 4.2 Features
The Kodak Hero 4.2 all-in-one printer has been designed for home or office users, which want high-quality prints at affordable rates. Despite the compact size of this inkjet printer, it is bundled with multiple features which can truly enhance its productivity.
The auto document feeder and auto duplex printing feature of this printer not only increases its productivity, but also reduces your printing costs.
The Smart Sensor technology of this printer, monitors and informs you about the real-time ink levels of your ink cartridge, which helps you in better ink management. You can connect this printer with your computer by using its USB and Wireless connectivity options.
Ink Cartridge Details: This inkjet printer uses one Black and one Color ink cartridge for printing. These ink cartridges are available in two size variants.
The standard Black (3952330) ink cartridge has a page yield of almost 355 pages and the high yield Black (3952363) ink cartridge can print up to 670 pages.
While the standard Color (30CL) ink cartridge can print nearly 390 pages and the high yield Color (30CL XL) ink cartridge has a page yield of up to 550 pages.