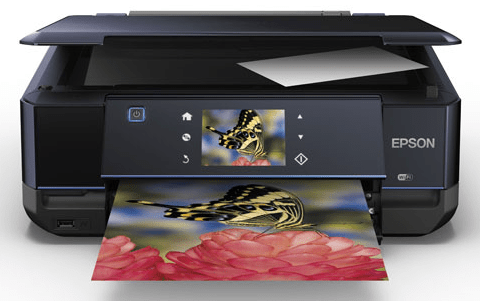
Here you get the latest driver. The latest drivers will always give you a bug-free experience.
In the download section of this guide, you will find the Epson XP-710 driver download links that will be compatible with Windows 11, 10, 8, 8.1, 7, Vista, XP (32bit / 64bit), Server 2000 to 2022, Linux, Ubuntu, and Mac 10.x, 11.x, 12.x, 13.x Ventura operating systems.
Along with that, also read the installation section to know how to properly install the newly downloaded printer drivers on your computer.
Steps to Download Epson XP-710 Driver
Step 1: Choose the operating system where you want to install this printer.
Step 2: Click on its download button to download your Epson XP-710 driver setup file.
Epson XP-710 Driver for Windows
Driver for Mac
Driver for Linux/Ubuntu
OR
Download the driver directly from the Epson XP-710 official website.
How to Install Epson XP-710 Driver
I have shared below the detailed installation guide for the full feature driver and basic driver (inf driver). Follow the instructions of the appropriate guide to install the Epson XP-710 printer drivers on your computer.
1) Install Epson XP-710 Printer Using Full Feature Driver
In the installation steps given below I have described the installation process for the full feature Epson XP-710 driver on a Windows computer. Following installation steps can be applied on all the version of the Windows operating system.
- Right click the full feature driver file, then select the ‘Run as administrator’ option.
- Wait for the self-extractor program to unzip the installer files on your computer.
- Select the ‘Epson XP-710 Series’ printer model icon, make sure that the ‘Set as default printer’ option is selected, then click on the ‘OK’ button.
- In the Select a language screen, choose your preferred language, I have selected the ‘English’ language, then click on the ‘OK’ button.
- In the Epson Eula screen, choose the ‘Agree’ option, then click on the ‘OK’ button.
- Wait for the setup program to check for the currently installed printer drivers.
- Click on the ‘Install’ button to begin the driver installation process.
- Wait for the setup program to update the installed information.
- Connect your Epson printer with your computer by using a USB cable, then switch on your printer. Wait for the setup program to detect your Epson printer and complete the driver installation process.
- When you see the message that the driver installation is completed successfully, then click on the ‘OK’ button.
That’s it, installation of the Epson XP-710 driver package has successfully completed on your computer. You can now use your Epson printer to print, scan and copy documents.
2) Install Epson XP-710 Printer Using Basic Driver
Follow the instructions given in the installation guide shared below to properly install the Epson XP-710 basic driver on your computer. Try this out: How to install a printer driver manually using basic driver (.INF driver).
Epson XP-710 Features
The Epson XP-710 all-in-one printer has a slim design and is capable of printing stunning photos and sharp text prints. You can connect this inkjet printer with your computer by using its USB and Wireless connectivity options.
Ink Cartridge Details: This inkjet printer uses one Black, one Photo Black, one Cyan, one Magenta and one Yellow ink cartridge for printing. These ink cartridges are available in two sizes.
The standard Black (C13T26014010) ink cartridge can print up to 220 pages and the high yield Black (C13T26214010) ink cartridge has a page yield of 500 pages.
The standard Photo Black (C13T26114010) and the high yield Photo Black (C13T26314010) ink cartridges can deliver nearly 200 pages and 400 pages respectively.
The standard Cyan (C13T26124010), Magenta (C13T26134010) and Yellow (C13T26144010) ink cartridges can print almost 300 pages per cartridge. While the high yield Cyan (C13T26324010), Magenta (C13T26334010) and Yellow (C13T26344010) ink cartridges have a page yield of almost 700 pages per cartridge.
