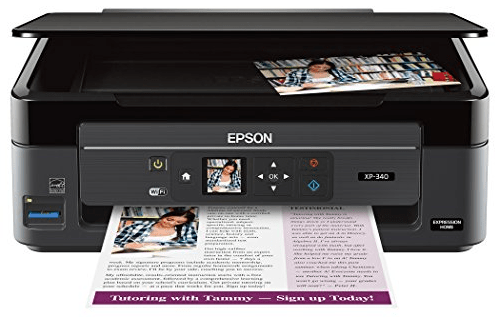

To download the latest version of the xp-340 driver, you should download the driver from its official website. If the official website is not working at that time then you can easily download the same drivers in the download section given below.
In the download section, you can download the Epson XP-340 driver that would be for Windows 11, 10, 8, 8.1, 7, Vista, XP (32bit / 64bit), Server 2000 to 2022, Linux, Ubuntu, and Mac 10.x, 11.x, 12.x, 13.x Ventura operating systems. After downloading the drivers you want to install on your computer, I have shared their proper installation guide as well.
Steps to Download Epson XP-340 Driver
Step 1: In the OS list, choose your preferred operating system.
Step 2: Click on its download link to get your Epson XP-340 driver setup file.
Epson XP-340 Driver for Windows
Epson XP-340 Driver for Mac
Epson XP-340 Driver for Linux/Ubuntu
Epson XP-340 driver for Linux and Ubuntu – Not Available
OR
- Download the driver directly from the Epson XP-340 official website.
How to Install Epson XP-340 Driver
I am sharing below the detailed installation guide for the full feature driver and basic driver (inf driver). Select the installation guide, which is appropriate for you, then follow its installation process to install the Epson XP-340 printer drivers on your computer.
1) Install Epson XP-340 Printer Using Full Feature Driver
Following installation steps describe the installation process for the full feature Epson XP-340 driver. You can follow these installation steps for all the versions of the Windows operating system.
- Run the full feature driver file downloaded from this page, then click on the ‘OK’ button to start the Epson Installer program.


- Wait for the Epson Installer program files to extract on your computer.


- Wait for the Epson Installer program to start.


- In the Welcome screen, accept the Epson End User License Agreement by clicking on the ‘Accept’ button.


- In the Software Selection screen, preferably you should proceed with the default selections by clicking on the ‘Install’ button.


- Wait for the installer program to download the Epson drivers and software on your computer.


- Wait for the installer program to install the drivers and software on your computer.


- In the Printer Setup screen, continue to the printer setup process by clicking on the ‘Next’ button.


- In the Select Your Connection screen, select the ‘Direct USB connection’ option, then click on the ‘Next’ button.


- Wait for the Epson printer to complete the ink priming process, then click on the ‘Next’ button.


- Connect your printer to your computer via USB cable and make sure the printer is switched on. Wait for the installer program to detect your printer, then follow the prompts to finish the driver installation process.


That’s it, installation of the Epson XP-340 printer driver package has been successfully completed on your computer. Your Epson printer is now ready for printing.
2) Install Epson XP-340 Printer Using Basic Driver
If you want to install this printer by using its Epson XP-340 basic driver (inf driver), then read the installation guide given below. Check out this method: How to install a printer driver manually using a basic driver (.INF driver)
Epson XP-340 Features
The Epson XP-340 all-in-one printer is a compact sized printer which makes printing, scanning and copying pages fast and simple.
The LCD screen on the control panel of this printer allows you to easily navigate the menu and access most of its features right from its control panel. You can connect this printer to your computer using its USB and Wireless connectivity options.
Epson XP-340 Ink Cartridge Details
This inkjet printer uses one Black (T288XL120-S), one Cyan (T288XL220-S), one Magenta (T288XL320-S) and one Yellow (T288XL420-S) ink cartridge for printing. The black ink cartridge can print up to 500 pages, while the Cyan, Magenta and Yellow ink cartridges can print nearly 450 pages per cartridge.

