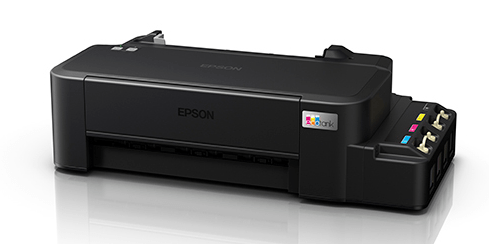

In this driver download guide, you will get the Epson L121 driver download links for Windows, Mac and Linux operating systems. All the drivers you will get from this page are genuine Epson printer drivers, which means these drivers are fully compatible with their associated operating systems. Apart from the genuine drivers, we have also shared their detailed installation guides so that you can properly install these drivers on your computer to get their best performance.
Epson L121 Driver Downloads
In the OS list given below you will find all the operating systems which are supported by this Epson printer. Follow the download steps mentioned below to get the Epson driver which is best suited for the version of your operating system. Don’t be confused with the model number and serial number. Its serial number is C11CD76503.
- Locate the operating system in our OS list where you want to install your printer driver.
- Click on the download link associated with your chosen operating system version to start the download of your Epson L121 driver setup file.
Epson L121 Driver for Windows
| Driver Description | Download Link |
| Full feature driver download link for Windows XP, Vista, 7, 8, 8.1, 10, 11, Server 2000, 2003, 2008, 2012, 2016, 2019, 2022 OS (32bit/64bit) | Full Feature Driver (v4.6.7) |
| Basic driver download link with installer for Windows XP, Vista, 7, 8, 8.1, 10, 11, Server 2000, 2003, 2008, 2012, 2016, 2019, 2022 OS (32bit/64bit) | Basic Driver 32bit (installer) Basic Driver 64bit (installer) |
| Basic driver download link with installer for Windows XP, Vista, 7, 8, 8.1, 10, 11, Server 2000, 2003, 2008, 2012, 2016, 2019, 2022 OS (32bit/64bit) | Basic Driver 32/64bit (INF) As it is a basic driver, you’ll have to install it manually. Here’s a step-by-step guide to install the above-mentioned basic driver. |
| Software updater for Windows (All editions) | Download |
Driver for Mac
Driver for Linux/Ubuntu
OR
Download the driver directly from the Epson L121 official website.
How to Install Epson L121 Printer Driver
Proper installation of the printer driver is important for its efficient functioning. If you have any questions regarding the installation process of your printer driver, then we have shared below installation guides for the Epson driver package and the Epson basic driver. Read the installation guide which describes the installation process of your driver type, then follow its instructions in their correct order to avoid printer driver installation mistakes.
1) Install Epson L121 Printer Using Its Full Feature Driver (Combo Pack)
The installation steps given below clearly describe the process of installing the full feature Epson L121 driver on a Windows computer. We have provided an image file for each installation step so that you can complete the driver installation without any problems. The following installation process can be used for all versions of the Windows operating system.
- Run the driver package file downloaded from this page and click on the ‘OK’ button to launch the Epson Installer program.


- Wait for the setup to install the driver package on your computer.


- In the Welcome screen, choose your preferred language and click on the ‘Next’ button to proceed.


- Agree to the Epson End User Software License Agreement by clicking on the ‘Accept’ button.


- In the Software Selection screen, select the software you want to install on your computer, then click on the ‘Install’ button.


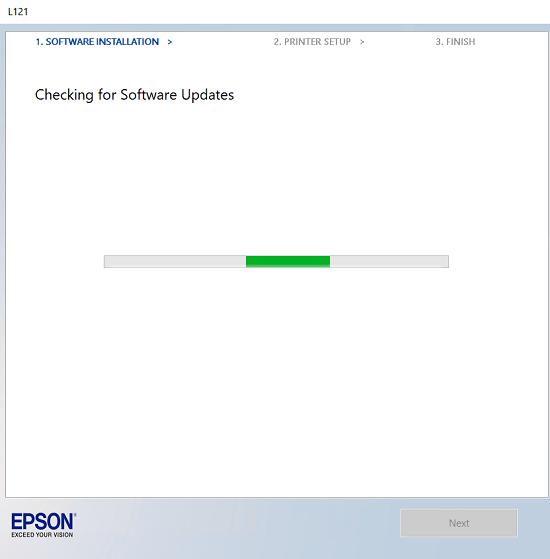
- Wait for the installer to check for the software updates that are necessary for your computer.

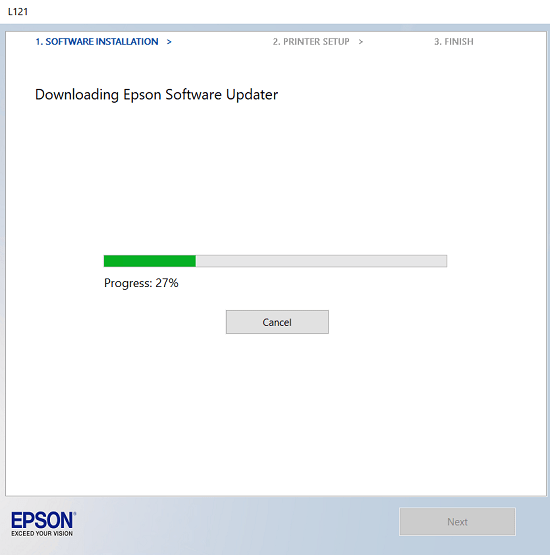
- Wait for the installer to download the necessary drivers on your computer.


- Wait for the installer to download the Epson Software Updater.

- Wait for the installer to install Epson drivers and utilities on your computer.


- Switch-on your printer and click on the ‘Next’ button.


- Fill the ink from the ink bottles into the ink tanks of your printer. If you have already filled the ink in the ink tanks of your Epson printer, then choose the ‘Click this box when ink charging is complete, then click Next’ option. Finally, click on the ‘Next’ button.


- Now connect your Epson printer with your computer by using a USB cable and follow the on-screen prompts to complete the driver installation process.


That’s it, you have successfully installed the Epson L121 driver package on your computer and your Epson printer is now ready for use.
2) Install Epson L121 Printer Using Basic Driver
Follow the steps given below to install the Epson L121 basic driver on your computer. You can follow the below mentioned installation steps for all the versions of the Windows operating system.
- Run the basic printer driver downloaded from this page and wait for its files to extract on your computer.


- In the Welcome screen of the Setup Utility, choose the ‘Epson L120 Series’ model, make sure that the ‘Set as default printer’ and ‘Automatically update software’ options are selected, then click on the ‘OK’ button.


- Choose your preferred language, then click on the ‘OK’ button.


- In the License Agreement screen, choose the ‘Agree’ option to accept the Epson End User License Agreement, then click on the ‘OK’ button.


- Wait for the driver setup to install the printer drivers.


- Now connect your Epson printer with your computer by using a USB cable and follow the on-screen instructions to complete the driver installation process.


That’s it, you have successfully installed the Epson L121 basic driver on your computer and your Epson printer is now ready for use.
3) Install Epson L121 Printer Using INF Driver
If you want to install your Epson printer by using its Epson L121 INF driver, then you must read the installation guide given below. Our guide clearly explains the right process of installing the Epson L121 INF driver on the Windows operating system.
How to install driver manually using basic driver (.INF driver)
Epson L121 Specs & Features
Epson L121 is an ink tank printer, which means it has been designed by Epson to deliver good quality prints at an affordable price. However, apart from the quality and low cost, this printer also offers fast print speeds.
The sleek and compact design of this printer makes it suitable for use in homes as well as offices. There are many more advanced features of this Epson EcoTank printer, but you can fully avail those features only when you install this printer by using its genuine Epson printer drivers.
Ink Cartridge Details: The ink for this Epson inkjet printer is available in ink bottles. The Black (C13T664100) ink bottle can print almost 2000 pages. While the Cyan (C13T664200), Magenta (C13T664300) and Yellow (C13T664400) ink bottles can print up to 3000 pages.
Hopefully you have learned the proper way to setup Epson L121 printer on your computer. If you still have any doubt, please leave it in the comments section below.
FAQs
Q: Hi, can I ask? How to download a driver for a Chromebook? Is there a need? Thanks.
A: No, this Epson L121 printer cannot be installed on your Chromebook because it is not compatible with the Chromebook. Please check the compatible Epson printer list for the Chromebook: https://epson.com/Mobile-Printing-and-Scanning-Solutions/Printing-and-Scanning-Solutions/Chromebook-Printing/p/CHROMEBOOKPRINT


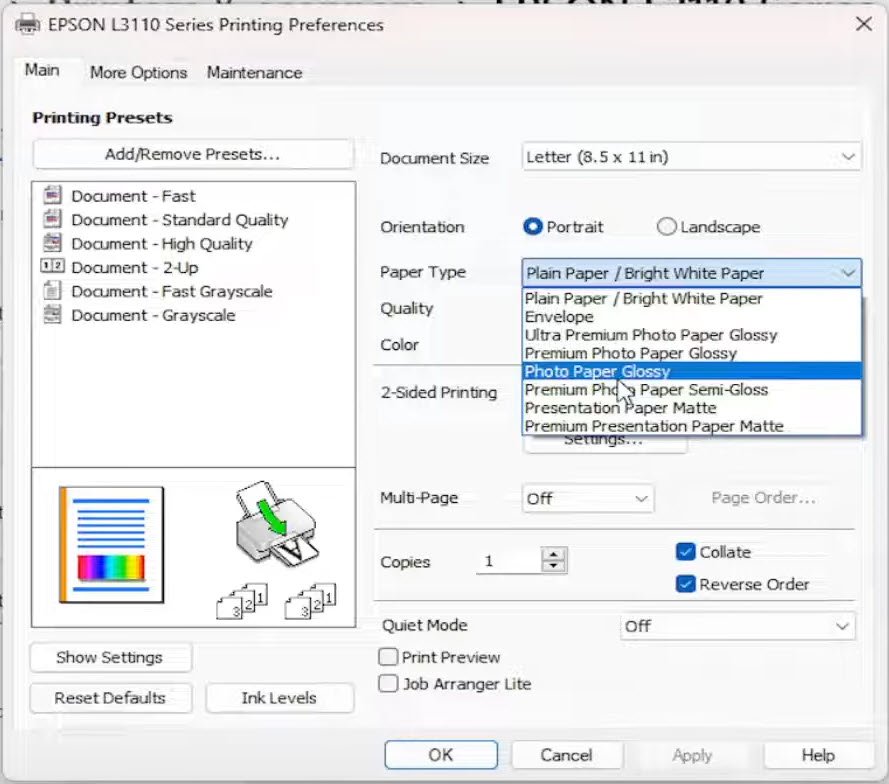
Why can’t I change the paper type into photo paper?
Here’s how you can change the paper type. Please see the screenshot:

Hi does Epson L121 can print to my android tablet?
You can connect this printer to your computer using this Epson Android App.
Mine l121 driver freezes at “Printer detected, Please wait’ Win 10 x64
To fix this non-detecting issue, apply these steps:
1) Connect the printer to the computer.
2) Uninstall “USB printing support” from the device manager. Like this: https://oip.manual.canon/USRMA-0323-zz-SS-enUV/Inst_source/contents/05010000.html. Also uninstall the printer driver if installed.
3) Disconnect the printer’s USB cable from the computer and reboot your computer.
4) After rebooting, now start installing the printer again and follow the on-screen instructions. Make sure the printer’s cable should not be connected until the printer-driver-installer asks you to connect it.
5) Now the driver-installer will ask you to connect the printer, now connect the printer’s USB cable to the computer. Make sure to connect it to another USB port then the previous one and wait for it to detect the printer automatically. This should be detected this time.
That’s it.
Please let me know the results.
thank you for the help
You’re most welcome. I am glad that the drivers worked for you.
really good
thank you
thank you for helping me on how to install printer in my laptop using you app..