Also, read the how to install section to install your newly downloaded printer drivers without any issues.
Canon PIXMA iP110 Driver Download
All the operating systems supported by this Canon printer have been mentioned in our OS list given below:
Step 1: Go through our OS list and select your preferred operating system.
Step 2: Click on the download button to start the download of your Canon PIXMA iP110 series driver setup file.
Windows
Full feature driver for Windows 11/10/8/8.1/7/Vista/XP/Server 2000 to 2022 (32bit/64bit) – Full Feature Driver / Basic Driver
File Name: win-ip110-1_1-mcd.exe / p86l-win-ip110-1_01-ea33_3.exe
Size: 50.7 MB / 15.7 MB
Version: v1.1
Language: English
Contains: Printer & Scanner Driver
Preferences: Recommended
Mac
Full feature driver for Mac OS 11.x, 12.x, 13.x, 14.x – Download (15.9 MB)
Full feature driver for Mac OS 10.13 to 10.15 – Full Feature / Basic Driver
Full feature driver for Mac OS 10.7 to 10.12 – Full Feature / Basic Driver
Full feature driver for Mac OS 10.6 – Full Feature / Basic Driver
Linux
Full feature driver for Linux and Ubuntu – Download (474 KB)
File Name: cnijfilter2-5.00-1-deb.tar.gz
Size: 774KB
Version: v5.0
Language: English
Contains: Printer & Scanner Driver
Preferences: Recommended
OR
Download the driver directly from the Canon PIXMA iP110 series official website.
How to Install Canon PIXMA iP110 Series Driver
In this section, I have shared the detailed installation guide for the full feature driver and basic driver (inf driver). Select the installation guide which is related to your driver, then follow its installation process to install the Canon PIXMA iP110 series printer driver without making any mistake.
1) Install Full Feature Driver
In the following guide, I will explain the installation process for the full feature Canon PIXMA iP110 series driver on a Windows computer. You can apply the following installation process for all versions of the Windows operating system.
- Right click on the full feature driver file, then click on the ‘Run as administrator’ option in the menu.
- Wait for the setup files to extract in the specified folder.
- Wait for the setup program to acquire the necessary information.
- In the Welcome screen, click on the ‘Next’ button to proceed.
- Wait as the setup program acquires information on the latest driver and software.
- Wait for the setup program to search for the Canon printer.
- In the Select the printer connection method screen, choose the ‘USB Connection’ option, then click on the ‘Next’ button.
- Select your place of residence, then click on the ‘Next’ button.
- Select your resident country from the list, then click on the ‘Next’ button.
- In the Software List, select the software and drivers which you want to install on your computer, otherwise, proceed with the default selections. Finally, click on the ‘Next’ button.
- Wait for the setup program to download the necessary drivers and software onto your computer.
- Wait for the installation of the drivers and software on your computer.
- Connect your Canon printer to your computer using a USB cable, then switch on your printer. Wait for the setup program to detect your printer, then follow the onscreen instructions as they appear to complete the driver installation process.
That’s it, the installation of the Canon PIXMA iP110 series driver package has been successfully completed on your computer. Your Canon printer is now ready for printing.
2) Install Basic Driver
If you have decided to install this printer by using its Canon PIXMA iP110 series basic printer driver, then follow the installation steps given below. You can use these steps for all the versions of the Windows operating system.
- Right click the basic printer driver file, then select the ‘Run as administrator’ option from the menu.
- Wait for the setup files to extract on your computer.
- Wait for the setup program to load on your computer.
- In the Welcome screen, click on the ‘Next’ button.
- Select your place of residence, then click on the ‘Next’ button.
- In the License Agreement screen, click on the ‘Yes’ button to accept the End User License Agreement.
- Wait for the installation process to proceed.
- In the Connection Method screen, choose the ‘Use the printer via USB’ option, then click on the ‘Next’ button.
- Connect your Canon printer with your computer by using a USB cable and switch on your printer. Wait until the printer is detected, then follow the onscreen prompts to complete the driver installation process.
That’s it, you have successfully completed the installation of the Canon PIXMA iP110 INF driver on your computer. You can now start using your Canon printer.
Features
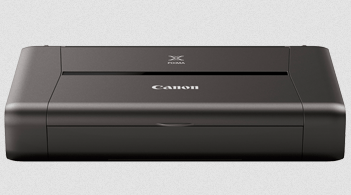
The Canon PIXMA iP110 series printer is a lightweight printer designed for users who want to print on the move using a portable printer. Due to the compact size of this printer, it can easily fit into a laptop bag. This color inkjet printer has a maximum print resolution of up to 9600 dpi and its top print speed is nearly 9 ppm. You can connect this printer with your wired and wireless computing devices by using its USB and Wireless connectivity options.
Ink Cartridge Details: This inkjet printer uses one Black (PGI-35BK) and one Color (CLI-36) ink cartridge for printing. The black ink cartridge can print up to 191 pages and the color ink cartridge has a page yield of nearly 249 pages.
