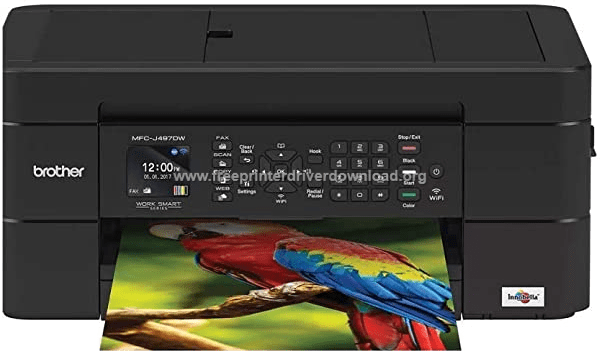
The Brother MFC-J497DW all-in-one printer is a true value for money product for home and small office users. This inkjet printer supports duplex printing and wireless connectivity, which makes this multi-function device economical and versatile. This machine is simple to connect, easy to operate and best suited for users who want to quickly scan and share documents.
Here, you will get the Brother MFC-J497DW printer driver download links for Windows, Mac and Linux operating systems. Along with the genuine Brother drivers we are also sharing their detailed installation instructions.


Steps to Download Brother MFC-J497DW Driver
Choose your preferred operating system from our OS list given below and use its download button to get your Brother MFC-J497DW driver setup file.
Driver Download Links
- Brother MFC-J497DW driver for Windows 7, 8, 8.1, 10 (32bit/64bit) – Download (470 MB)
- Brother MFC-J497DW driver for Server 2008, 2012, 2016 (32bit/64bit) – Download (51.7 MB)
- Brother MFC-J497DW driver for Server 2019 (32bit/64bit) – Download (51.7 MB)
- Brother MFC-J497DW driver for macOS 11 Big Sur – Not Available
- Brother MFC-J497DW driver for Mac OS 10.15 – Download (27.6 MB)
- Brother MFC-J497DW driver for Mac OS 10.11 to 10.14 – Download (27.2 MB)
- Brother MFC-J497DW driver for Linux, Ubuntu ▼
Printer Driver (3.3 MB) / Scanner Driver 32bit (90 KB) / Scanner Driver 64bit (107 KB)
OR
- Download the driver directly from the Brother MFC-J497DW Official Website.
How to Install Brother MFC-J497DW Driver
Please read the printer driver installation guide given below to properly install your printer driver. Our guide describes the right method of installing a printer driver.
- How to install driver automatically using its setup file
- How to install driver manually using basic driver (.INF driver)
How to Setup Brother MFC-J497DW via Wi-Fi Router
When you are installing the full feature Brother MFC-J497DW driver you have the option to connect your printer via your Wi-Fi router. The process of doing this is described below.
- Run the driver package, select your language, and click “Next“.


- Accept the agreement and click “Next“.


- Select ‘Wireless Network Connection (Wi-Fi)’ option, then click ‘Next’.


- In the ‘Detecting Existing Wireless Network Settings’ window, first verify your network’s name, then click ‘Next’.


- Wait for the setup wizard to find your Brother printer over the network.


- Now one of the three things would happen: a) Printer will be detected by the Setup Wizard, b) Enable wireless connection window will appear, or c) Failed to connect window will be shown. We will consider these options one-by-one. Follow the steps according to the option you are shown.
a) Setup Wizard Detects your Printer
- In the printer list, select your Brother printer and click ‘Next’.


- Choose ‘Standard’ method of installation and click ‘Next’.


- Let the program install ‘iPrint&Scan’ app.


- You may install ‘PaperPort’, or click ‘Next’ to proceed.


- Click ‘Next’.


- Click ‘Finish’ to complete.


- That’s it, you have successfully connected the Brother MFC-J497DW printer to your computer through wireless network.
b) Enable the Wireless Connection Window is Shown
- As ‘Enable the Wireless Connection’ window appears move to the printer control panel.


- Press ‘Down arrow’ key to open the menu on printer display.


- Press ‘Down arrow’ key to reach ‘WLAN Assistant’.


- Press ‘OK’ to continue.


- Press ‘Right arrow’ key to Enable WLAN.


- Again press ‘Right arrow’ to continue.


- Wait for the WLAN network to configure.


- On the computer, choose your Brother printer from the printer list and click ‘Next’.


- Select ‘Standard’ installation and click ‘Next’.


- Allow ‘iPrint&Scan’ app to be installed.


- If you don’t want to install ‘PaperPort’, then click ‘Next’ to proceed.


- Click ‘Next’.


- Click ‘Finish’.


- You have successfully connected the Brother MFC-J497DW printer to your computer via the Wi-Fi network.
c) Failed to Connect Message Window Appears
- When you see ‘Failed to Connect’ window, click on ‘Next’.


- Select ‘No, I do not have a USB cable’, then click on ‘Next’.


- When ‘Configure manually from the control panel’ window appears. Verify the ‘SSID’ and ‘Network Key’, of your Wi-Fi router. You will find this information on the bottom side of your router. Now, move to your printer control panel.


- Press ‘Down arrow’ button on the printer control panel.


- Choose ‘Setup Wizard’ and press ‘OK’.


- Press ‘Right arrow’ key to Enable WLAN.


- Select your Network/SSID name from the list and press ‘OK’.


- Use arrow keys on the control panel to enter the ‘Network Key’. Press ‘OK’ after each digit to confirm its entry.


- After Network Key has been entered properly, then move the cursor to the ‘OK icon’ on the display screen and press ‘OK’ on the control panel.


- Wait for the printer to connect to WLAN.


- After connection is successful, press ‘Right arrow’ key.


- On your computer, click ‘Next’ on the ‘Configure manually from the control panel’ window.


- Select ‘Checked and confirmed’ checkbox, then click ‘Next’.


- When you see your Brother printer in the list. Choose your printer and click ‘Next’.


- Choose ‘Standard’ install process and click ‘Next’.


- Wait for the download and installation of ‘Print&Scan’ app.


- Install ‘PaperPort’ if you want to, or else, click ‘Next’.


- Click ‘Next’ to continue.


- Click ‘Finish’.


- Your Brother MFC-J497DW printer has been successfully connected to your computer via the Wi-Fi router.
Ink Cartridge Details
This Brother printer uses one Black, one Cyan, one Magenta and one Yellow ink cartridge. The standard sized Black (LC3211BK), Cyan (LC3211C), Magenta (LC3211M) and Yellow (LC3211Y) ink cartridges can print up to 200 pages per cartridge, while the high yield Black (LC3213BK), Cyan (LC3213C), Magenta (LC3213M) and Yellow (LC3213Y) ink cartridges can print nearly 400 pages per cartridge.

